Tenere 700: Camel T7 Fuel Cap Seal & Camel T7 Side Stand Safety Switch Bypass Plug
Camel T7 Fuel Cap Seal
As per Camel's recommendation below I only used 1 of the 1.5 mm thick seals because 2 made it very difficult to click properly in place with both spring loaded locking tabs. Despite my Giant Loop Fandango tank bag having a raised cut out for the fuel cap it can still apply pressure on the rear of the cap pivoting it down at the back when loaded.

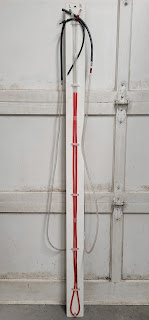
My fuel cap with 1 Camel seal installed

From Camel Website
An annoying issue with the T7 is its leaking fuel tank cap seal. The cap has a spring-loaded seat under it, and if there is any downward pressure on the cap other than straight down, the cap rocks slightly, and the seal starts to leak.
I know you're thinking, "Why would there be pressure on my fuel cap?!". If you use a tank bag, it will sit on top of the gas cap, and it can apply pressure. If you drop your bike and the tank bag is pushing on the cap, there's a good chance it (and its contents) will be soaked with gasoline... way less than ideal.
This leaky cap problem also creates issues for our Camel Tank customers. Fuel is transferred from the Camel Tank to the main tank using vacuum. If the main tank cap doesn't seal properly, no vacuum is created, and the fuel won't transfer properly.
Our 1.5mm thick Viton sealing ring is a quick, cheap, and effective way to keep the gas and fumes in your fuel tank.
We are now including TWO 1.5mm Viton seals in each kit. Some bikes don't have room for a 3mm seal, and others won't seal with a 1.5mm seal. Start with one seal and add the second if needed!
Instruction Video from Camel Website
The T7 incorporates a 2 part ignition circuit cut-off system. A clutch switch prevents the bike from starting when in gear, unless the clutch lever is pulled in & a side stand switch prevents the bike from being ridden when the side stand is down. A damaged or faulty side stand switch will cause the bike not to run when in gear regardless of the side stand position, or if the side stand bounces low enough to activate it the switch will kill the motor while riding, the Camel heady duty side stand spring helps prevent this, so some opt to bypass it. The switch is located behind the side stand mount, integrated into the back of the side stand pivot & exposed with the oem Yamaha skid plate & many aftermarket skid plates (the AXP skid plate is one of the few that offer protection) & is susceptible to damage or being impacted by water & muck whereby the signal may be broken. Fortunately it is a simple design that can easily be bypassed on the trail if damaged or faulty by splicing the 2 wires together. A more elegant & pre-emptive solution is to wire in a bypass adapter plug at the oem wiring harness connector located behind the left front body panel & the radiator cowl...just be aware that once that switch is bypassed the bike can be ridden with the side stand down.

Side Stand Switch Plug Location
The side stand switch oem wiring harness connector is located behind the left front body panel & the radiator cowl zip tied to the back of the frame tube.


Tech Tip: use dialectric grease on the oem female connector/Camel bypass plug connection & secure to frame tube with zip tie. If not removing the unused oem male connector & wiring harness from the bike, zip tie the unused connector to the frame tube as well. Test ride bike to ensure the bypass plug connection allows the bike to be ridden.

From Camel Website
Your T7's side stand safety switch makes it impossible for you to ride away with your side stand down. It is a handy feature until your switch is damaged while riding offroad. When that happens, your bike will not run in gear which can leave you stranded on the side of the trail.
Luckily, our bypass plug is quick and easy to install! You can install it ahead of time or on the trail after a switch impact has occurred.
Camel Install Video


Comments
Post a Comment