Installed new NGK #91909 LMAR8BI-9 Laser Iridium Spark Plugs @ 17,678 km, which are the Iridium equivalent of the oem Yamaha NGK #4313 LMAR8A-9 standard plugs to be changed every 13,000 km/8,000 miles...the oem plugs had no major deterioration with similar discoloration & normal operation of the bike except for a slight increase in vibration/courseness that commenced around 15-16k kms...which has vanished after changing the plugs. Apparently knock off fake plugs are a real thing so do your due diligence to ensure authentic NGK plugs...I sourced mine from a local Vancouver family owned shop 'Modern Motorcycling Ltd' whose everyday prices are usually better than most on-line vendors & dealers. The benefit of iridium plugs is longer service life/interval & improved performance.
Plug Removal Process
The job is involved & time consuming as access to the plugs & coils is restricted. Many thanks to others who have shared techniques, pics & videos on the process that includes removal of the seats, tank & all front side covers the 1st time & then doing a few tweaks that can be time savers for subsequent plug changes, that include removal of the right side plastic electrical tray/wiring harness holder & strapping up the wiring harnesses that blocks access to the plugs. As per the Yamaha Tenere 700 Forum here once the tray is removed both plugs can be accessed & removed from the right side even with the tank in place with the right amount of finesse & tool selection (small hands being an asset). To get a full understanding/appreciation for the job & time saving techniques, as it is my 1st go at it, I removed everything for full access. Once the electrical connectors are detached from the tray & the tray is removed, the large wiring harness on the right side can be held back & out of the way via a bungy cord.
Tech Tips: The fuel line connector to the tank has an orange safety clip that needs to be slid outward to allow removal of the fuel line coupler from the plastic inlet pipe. Note that if the tank is full & leaned to one side, particularly to the right, fuel will leak from the vent pipe located on the underside if the vent hose has been removed.
Right Side Plastic Electrical Tray That Facilitates Easier Access Once Removed
Access to plugs/coils After Removal of Tray
Removal of the plug coils can be difficult, particularly the 1st time. A large flat head screw driver or angled pry bar with a flat head end simplifies removal by inserting it from the back over the valve cover with the flat end prised under the lip of the plug coil shaft (not the protruding plug at the top) at the upper edge of the pliable rubber seal & prying straight up using the valve cover as a fulcrum...a piece of thin plastic, inner tube or cloth can be used to protect the valve cover surface from scarring.
Tech Tips: Clean the valve cover & area around the plug coils prior to removal to prevent debris from falling into the plug holes.
Unbolt dual Hydraulic Lines for Overhead Access to Right Plug (Optional)
Although not necessary, I opted to unbolt the dual hydraulic lines bolted to the center frame spine (2 bolts) which allowed direct overhead access to the right plug with a 14 mm socket + long extensions & 1 u-joint adapter on top of the socket for added flexibility.
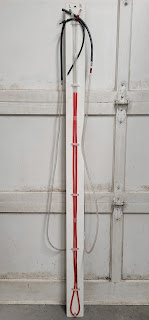
Fuel Line Hose used for Plug Removal/Install
In lieu of either a magnetic or rubber insert spark plug socket that holds the plug in place a length of 3/16" or 8 mm i.d. fuel line hose was used to extract & install the plugs.
Loosen ABS pump & Rectifier Bracket for Overhead Access of Left Plug
The left plug benefits from loosening off the ABS pump & rectifier bracket & wiggling it outward to allow direct overhead access of the left plug.
Tech Tips: The plug coils require a firm push down to fully seat on the threaded plug end...having direct overhead access allows sufficient leverage/pressure. Use of dielectric grease on all electrical connections & high temp grease on the coil pack shaft upper sealing ribs is recommended during installation & reassembly which should aid removal in the future.
Reinstall Tank & Body Panels
Tech Tips: If fuel tank was removed ensure that the fuel gauge electrical connector lock tab clicks firmly in place & that the fuel line coupler is positively snapped onto the tank inlet pipe & the orange safety clip is pushed into the locking position. Start bike to ensure proper function & no leaks.
The bike started quick & strong on the 1st crank after installation of a Black Widow Decat Race header which can be viewed elsewhere on my blog here.
Detailed Video by Oumbouk Travel Adventures replacing Yamaha Tenere 700 Sparkplugs
Yamaha Tenere 700 Service Manual Spark Plug Check Instructions
Tech Tips: Yamaha specifies plug gap 0.8 - 0.9 mm or 0.031 - 0.035" (NGK spec is 0.9 mm or 0.035") & 13 Nm or 9.6 lb-ft torque. These instructions include removing the right radiator mount bolt & moving the radiator forward, which is not necessary.
Tenere 700 Throttle Body Sync Procedure At 12k km it was time to check my 2021 Tenere 700's throttle body sync, which I suspect is out a little, as the bike is no longer quite as smooth as it once was. This requires some form of vacuum gauge & about 1 hour to remove body panels & tank to gain access to the throttle bodies, sync them & put it all back together....not a difficult job, just a little time consuming. Bike Specs 2021 Tenere 700 Canadian model (Japan Factory) 12, 218 km 7,591 miles oem original spark plugs valve clearance oem factory Guglatech Ultra 4 Air Filter + FunnellWebFilters Pre-Filter Chevron regular 87 RON unleaded fuel Required Tools #4 & #5 allen, T30 Torx, small diameter punch for push pin connectors, long needle nose pliers, small slotted screwdriver differential manometer or vacuum gauges - years ago I made an inexpensive & easy to make differential monometer that consists of about 6 meters or 20' of 5/16th" OD/3/16th" ...
Rally Raid T7 Adventure 35 mm Open Cartridge Fork Kit The Rally Raid Tenere 700 Adventure 35 mm open cartridge fork kit was developed in conjunction with Tractive Suspensions in the Netherlands and offers a substantial increase in performance & adjustability over the oem forks. fully adjustable for spring preload with rebound & compression damping in separate forks with top mounted adjusters 35mm piston for improved oil flow, damping performance, feel & response time supplied with linear fork springs (5.6 Nm or 0.57 kg/mm, 6.0 Nm or 0.61 kg/mm, 6.4 Nm or 0.65 kg/mm) to match the rider weight hard anodized aluminum components to give optimum performance, reduce friction & make service simpler & less frequent Rally Raid designed hydraulic end stop (PDS) avoids mechanical impact on the forks includes adjustable fork preload caps (11mm range) & spanner + additional plastic spacers for up to another 12mm of preload range. It has the same travel as the OEM ...
Motoz Tractionator Rallz Tires For Tenere 700 Many riders seeking improved off-road performance vs the oem Pirelli STRs are going with the Motoz Tractionator Rallz tires in oem 90/90-21 54 TT front & 140/80 18 TT vs the oem 150/70 18 70 TL rear size. RideAdv, a tour company with a fleet of T7s in Australia, along with many others, have been successfully running a Pirelli Scorpion Rally 140 rear size on the oem MT 4.00" safety/tubeless rear wheel. Most adopters of the 140 rear vs the 150 oem size are motivated by improved off-road performance, higher speed rating, less weight & cost. Noted trade offs are that the 140 width tire is ~ 0.55" or 14 mm taller with a diameter of 681 mm vs the 150 667 mm (check for clearance with the oem shock/swing arm plastic mud flap), noisier, less proficient on the road & may unseat the bead with low tire pressures due to it's narrower bead spacing & sometimes softer carcass when used ...


Comments
Post a Comment