Dirt bikers know that it is beneficial to squeeze their bikes mid section with their legs when standing...Australian made Steg Pegz, via their stackable rubber doughnut shaped pucks (up to 3), provide increased purchase for your boots allowing for the transfer of more leverage to the legs with less effort & less reliance on upper body strength resulting in a more relaxed grip on the bars & reduced hand/arm/upper body fatigue...all of which foster improved interface with the clutch, brake & throttle & by extension rider safety.
This type of rider aid may be overlooked by the average Adventure bike rider, but the fitness/strength of my mid 60s core, legs & upper body appreciate any available advantage (see MVDBR Enduro's video "Are Steg Pegz Worth it on a Tenere 700?" below)...so I made my own calf pegs design using pre-formed 90 degree 3/16" (4.76 mm) thick aluminum stock for the mounting brackets & Amazon sourced rubber bumpers (skate board wheels are another alternative).
Tech Tip: For ease of servicing an access hole in the right bracket facilitates removal/install of the rear brake reservoir mounting bolt located behind it & used 1/4" x 25 mm allen button head bolts for the mounting bracket & cut down allen key for clearance with the high mount MIVV Dakar exhaust mid-pipe. Blue Loctite is recommended on all bolts.
Can OEM Passenger Footpegs Still be Used?
I have not confirmed it, but is seems likely that my brackets & Steg Pegz should be compatible with the oem passenger footpeg hangers (longer bolts may be needed) on bikes with oem exhaust & some high mount exhaust systems like the MIVV (Camel ADV Products specifically notes that their Enduro Bend exhaust is not compatible with "hard pannier racks & pillion pegs"). Side luggage racks that utilize that mounting location may complicate compatibility. Do your due diligence beforehand to ensure compatibility with your specific bike set-up.
Mounting Brackets
See pics below for approximate dimensions & design.
Initial Design - Cardboard Mock-up
Use cardboard for mock ups during the design phase to develop a template for laying out the project on your aluminum stock (it can be flipped/reversed for use on the other side - except for positioning of the mounting holes as noted in the text & picture below)...I opted to start with the exhaust side as it had the most design challenges/criteria & hand fabricated it with basic tools, located & drilled the holes...then used it as the working template for the other side & will either clear coat or paint them. Chamfer or round off the sharp edges & corners, particularly the leading edge of the bracket that may contact your leg/boot (Steg Pegz bends that part of their bracket inwards).
Final Design - Aluminum
Pre-formed 90 degree 3/16" (4.76 mm) thick aluminum stock sourced from local supplier Metal Supermarkets provides sufficient rigidity/strength for the mounting brackets.
The oem passenger footpeg hanger frame bolt bosses used for mounting the brackets have 7 cm on center hole spacing & used M8 x 25 mm allen button head bolts & cut down allen key for clearance with the MIVV Dakar exhaust mid-pipe during install.
I opted to use M7 x 25 mm carriage bolts for mounting the bumpers because they have narrow profile smooth button heads negating the need for a wrench & maximize clearance with the rear side panels...which required squaring off the bumper mount hole with a dremel tool for proper fitment of the bolts.
NOTE: the right & left bracket mount holes differ in position in order to obtain symmetrical positioning of the mounting brackets & bumpers relative to their respective side panels...check the left mounting plate for adequate clearance with the chain...I trimmed about 9.5mm or 3/8" off the inner edge (see pic below).
Rubber Bumpers
I sourced 2.54 cm or 1" thick x 6.35 cm or 2.5" diameter trailer, ramp, door bumpers on Amazon, which are about 1.5x thicker & 1.24x larger in diameter & may be a softer compound than the Steg Pegz pucks, which positions their outer surface almost flush with the widest part of the rear body side panels, while allowing your legs to bypass them when not in use & during foot down placement at stops. Optimal placement of the bumper height on the upper mount section may be dependent on the height of your boot, what footpegs & peg lowering kit you may be using. Steg Pegz allows for front to back adjustment & you may wish to incorporate that functionality via a slot or separate holes. I chamfered the sharp inner edge of the bumpers for added clearance with the body panels, used some vacuum line tubing as a bush for the center hole that was the same o.d. as the 7/16" bumper hole & i.d as the 1/4" x 25 mm carriage bolts & used 20 mm wide fender washers & nylock nuts.
Tech Tip: For best boot durability & calf comfort locate the bumper where it contacts hard plastic or thick/padded durable material on the boot.
Interface With Boots
NOTE: Boots with a TPU protruding upper back hinge design, like Alpinestar's Tech 7, don't interface well with the calf peg puck require additional pucks.
Preliminary Review
A full review/evaluation will have to wait until the bike is insured next month, but preliminary observations from standing on the bike are encouraging as they really make it easy to lock my legs securely in place against the bike's mid section with just light leg pressure allowing me to pivot at the knees forward & back without hands on the bars. I will be curious to see how the height feels as they contact the upper/mid part of my calf...it would be easy to modify the mounting bracket for a lower bumper position if wanted.
Update Converted to 51 mm or 2"Rubber Pads - July 2023
I found the 2.5" diameter rubber bumpers previously used to be too large forcing me too far forward when standing so am now using Everbilt HD Ant-Skid Rubber Pads that more closely approximate the diameter of the Steg Pegz pucks. Each pad is 51 mm or 2" in diameter x 7.8 mm or 5/16" thick & used 3 pairs which provide 51 mm or 2" of width for more purchase on my riding boots, which required longer 1/4" x 60 mm carriage bolts. I also elongated the frame mounting bracket holes slightly allowing the brackets to be moved outward & for angle adjustment, now contact my calf closer to the middle for more comfort & stability vs on the inside edge...my Alpinestar Tech 7 boots have a protruding TPU guide for the rear stabilizer that requires wider calf pegs to prevent slippage of the boot past them.
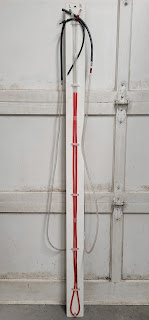
Tenere 700 Throttle Body Sync Procedure At 12k km it was time to check my 2021 Tenere 700's throttle body sync, which I suspect is out a little, as the bike is no longer quite as smooth as it once was. This requires some form of vacuum gauge & about 1 hour to remove body panels & tank to gain access to the throttle bodies, sync them & put it all back together....not a difficult job, just a little time consuming. Bike Specs 2021 Tenere 700 Canadian model (Japan Factory) 12, 218 km 7,591 miles oem original spark plugs valve clearance oem factory Guglatech Ultra 4 Air Filter + FunnellWebFilters Pre-Filter Chevron regular 87 RON unleaded fuel Required Tools #4 & #5 allen, T30 Torx, small diameter punch for push pin connectors, long needle nose pliers, small slotted screwdriver differential manometer or vacuum gauges - years ago I made an inexpensive & easy to make differential monometer that consists of about 6 meters or 20' of 5/16th" OD/3/16th" ...
Rally Raid T7 Adventure 35 mm Open Cartridge Fork Kit The Rally Raid Tenere 700 Adventure 35 mm open cartridge fork kit was developed in conjunction with Tractive Suspensions in the Netherlands and offers a substantial increase in performance & adjustability over the oem forks. fully adjustable for spring preload with rebound & compression damping in separate forks with top mounted adjusters 35mm piston for improved oil flow, damping performance, feel & response time supplied with linear fork springs (5.6 Nm or 0.57 kg/mm, 6.0 Nm or 0.61 kg/mm, 6.4 Nm or 0.65 kg/mm) to match the rider weight hard anodized aluminum components to give optimum performance, reduce friction & make service simpler & less frequent Rally Raid designed hydraulic end stop (PDS) avoids mechanical impact on the forks includes adjustable fork preload caps (11mm range) & spanner + additional plastic spacers for up to another 12mm of preload range. It has the same travel as the OEM ...
Motoz Tractionator Rallz Tires For Tenere 700 Many riders seeking improved off-road performance vs the oem Pirelli STRs are going with the Motoz Tractionator Rallz tires in oem 90/90-21 54 TT front & 140/80 18 TT vs the oem 150/70 18 70 TL rear size. RideAdv, a tour company with a fleet of T7s in Australia, along with many others, have been successfully running a Pirelli Scorpion Rally 140 rear size on the oem MT 4.00" safety/tubeless rear wheel. Most adopters of the 140 rear vs the 150 oem size are motivated by improved off-road performance, higher speed rating, less weight & cost. Noted trade offs are that the 140 width tire is ~ 0.55" or 14 mm taller with a diameter of 681 mm vs the 150 667 mm (check for clearance with the oem shock/swing arm plastic mud flap), noisier, less proficient on the road & may unseat the bead with low tire pressures due to it's narrower bead spacing & sometimes softer carcass when used ...


%20Trailer%20Ramp%20Door%20Bumper%20-%20Truck%20Cargo%20Hatch%20Rubber%20Bump%20Stop1.jpg)


Comments
Post a Comment