Super Tenere 1200: Replacing/Cleaning the "Tea Bag" Fuel Pump Filter to Restore Mileage & Power - Guglatech Fuel Filter
Unfortunately Yamaha does NOT sell a replacement "tea bag" fuel filter despite it being a press on design that easily separates from the pump for cleaning. Another Yamaha Super Tenere Forum member (BWC) kindly published detailed pics & procedure of the pump removal in 2017 via this link: https://www.yamahasupertenere.com/index.php?threads/fuel-filters.23488/
So I won't repeat that info except to reiterate to be careful of the fuel sender unit & the necessity to carefully depress the small plastic tab slightly on the FP housing to clear the fuel tank opening during removal...once removed the fuel sender assembly can be removed from the plastic housing & the housing comes apart via releasing the tabs exposing the metal cased pump. Placing thin plastic between the housing locking tabs eases separation of the inner pump housing.
Before Cleaning Pics: My 2014 ES has 35k km, of which the bike had a Guglatech fuel filter installed in the tank for the last 13k km, so this dirt build should be from the 1st 22k km using mostly Chevron Premium unleaded 91 and/or pre-existing tank sediment from manufacturing. Fuel mileage & performance had recently dropped off a little...all of which was restored after cleaning...so it demonstrates that it does not take much dirt to reduce the effectiveness of the pump, which in turn impacts the fueling & fuel pressure (if fuel pressure drops below the injectors threshold the bike will not run)....the falloff is gradual so many may not notice it..but I keep regular records of fuel mileage & could notice the power flatten off/plateau a little in the mid/upper rpms.
After Cleaning Pics: I followed BWC's suggestions for back flushing the pump (which contains a small internal screen filter) & the tea bag, with cleaner fluid & fresh gas, cleaning with a soft toothbrush & using low pressure air...then purging all contaminates by running the pump via cycling the ignition switch on, which pressurizes the pump for approx 4 sec, in a bucket of fresh gas until the output was clear...approx 1 litre...used the oem fuel line with quick connects for the outflow of purging fuel into a separate container.
Tips: take pics of each stage before disassembly to assist reassembly of parts in the correct orientation, sequence, location.
- ensure that the small black o-ring on the elongated white plastic fuel tube on the inside of the white plastic housing is correctly seated (if not, there will not be enough fuel pressure to the injectors for the bike to run)
- be sure to insert the half moon shaped white plastic piece located near the tea bag attachment point correctly to allow the tea bag filter to attach to the inlet tube correctly, if rotated 180 degrees it will sit elevated on the raised pump metal tabs preventing the tea bag filter from correctly attaching to the inlet tube
- the fuel line hose will kink/bind if mounted in reverse direction or if rotated 180 degrees from the oem orientation when lowering the tank (the quick connectors will attach to either the fuel injector rail or the fuel pump). Suggest only disconnecting the hose at the fuel injector rail end...that will permit use of the hose attached to the fuel pump for testing & purging contaminates prior to re-installation.
Replacement Filters: This filter for Yamaha R1/R6/FZ6 (pic below left) IS an identical match to the oem tea bag! Idle was smoother after installation of the new filter. https://www.aliexpress.com/i/32849361097.html $5.79 us / pkg of 2
Some have said a Suzuki #15420-05H00 filter (pic below) will fit, although not sure if the locating hole is positioned correctly + not sure if the external dimensions are the same https://www.amazon.com/5PCSStrainer-Motorcycle-V-Strom-Gsxr1000-15420-05H00/dp/B07C1W3ZM2
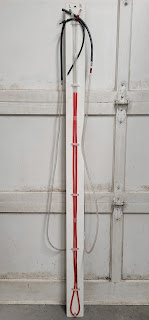
Guglatech Filter: As previously mentioned I have been using a Guglatech fuel filter for the past 13k kms, which has remained clean since installed...so am curious to see how clean the fuel pump "tea bag" strainer remains.


Comments
Post a Comment